Dried whole chilies to custom chili flakes and powder: complete 2026 workflow
Learn how to make chili flakes from dried whole chilies: crush for texture, grind for powder, and store small, dry batches for everyday cooking.
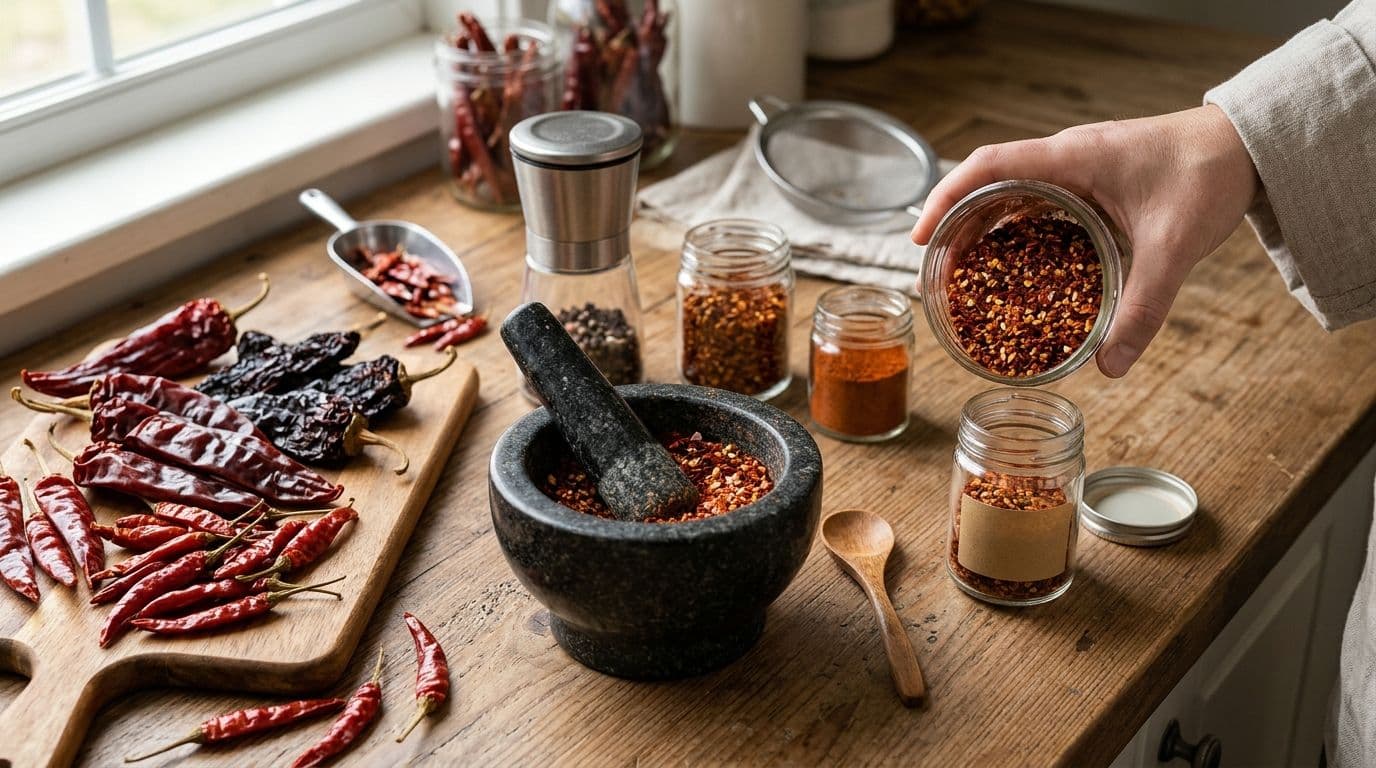
Instead of crushing dried chilies separately for every meal, make a small batch of custom chili flakes, then grind a portion into powder. Remove the stems, check that the pods are brittle, crush in short bursts, and stop at the texture your cooking needs.
TL;DR- How to make chili flakes from dried whole chilies: destem dry pods, crush briefly, and stop before they become powder.
- 5Senses Kashmir Dried Red Chili (Marchwagan Melody) brings slightly fruity, smoky aroma with subtle heat.
- Keep chilies dry for flakes and powder; rehydrating belongs to a separate sauce-making workflow.
- Make coarse chili flakes for finishing and fine chili powder for rubs, sauces, and even seasoning.
Why this matters
Whole dried chilies let you choose the texture at the moment you cook. Coarse pieces give a visible, textured finish; finely ground chili disperses more evenly through a rub or sauce. Neither format replaces the other.
Start with the ingredient, not the grinder. 5Senses Kashmir Dried Red Chili (Marchwagan Melody) comes from Kashmir, with a stated high-altitude valley microclimate and a slightly fruity, smoky aroma with subtle heat. The Kashmir red chili origin story gives that growing-place context. Growing environment and origin packing describe different parts of the ingredient's journey; neither tells you how finely to grind it.
5Senses Kashmir Dried Red Chili (Marchwagan Melody) is best for cooks seeking slightly fruity, smoky chili flakes with subtle heat. It is not the choice when your main goal is intense heat. Choose the chili for its flavor first, then choose the grind for the dish.
Before you start
- Gather dry equipment: dried whole chilies, kitchen scissors, a clean tray, a mortar and pestle or spice grinder approved for dried chilies, and airtight containers. Use gloves when handling chilies, and keep your hands away from your eyes.
- Check the pods: use sound chilies without visible mold, damp patches, or musty odors. A leathery pod does not grind like a brittle one. Do not mistake a grinder problem for an ingredient that needs further drying.
- Plan for chili dust: work with ventilation, keep your face away from the grinder, and let airborne particles settle before opening it. Do not rinse or soak chilies intended for dry grinding; added moisture changes the workflow.
Choose a small first batch rather than filling the grinder. You need room for pieces to move, and you need to see how quickly your particular equipment turns flakes into powder. Follow the appliance's loading and operating instructions.
Pod preparation
Inspect, destem, and split
- Spread the dried chilies on a clean, dry tray. Inspect each pod before it joins the batch; discard any with signs of mold or spoilage rather than trying to trim away the affected area.
- Snip off the stems with kitchen scissors. Open the pods lengthwise over the tray so loose seeds stay contained.
- Remove loose seeds if you want a less seedy texture. For less heat, also remove some of the pale internal tissue, where capsaicinoids are concentrated; removing seeds alone does not give a predictable heat reduction.
- Cut or tear the pods into pieces that fit comfortably in your grinder or mortar. Keep the pieces reasonably similar so a large strip does not remain untouched while smaller pieces become dust.
Expected result: stem-free chili pieces with a consistent seed policy across the batch. The pieces should be dry enough to crumble rather than fold around the blade or pestle.
Do not promise yourself a particular heat level based on seed removal. Chili variety, individual pods, and the amount used all affect the finished dish. Taste the ground batch in food before treating it as an exact replacement for another chili seasoning.
Decide whether to toast
Toasting is optional. It changes the flavor, so skip it when you want to preserve the chili's existing character without adding a roasted note.
For toasted flakes, warm a dry skillet over gentle heat. Move the opened chili pieces continuously and remove them when their aroma becomes more pronounced, before they blacken or smoke. Thin chili skins scorch quickly; a fixed timer is less useful than watching the pan.
Spread the pieces on the tray and let them cool fully before crushing. Warm chilies and warm equipment make it harder to judge the finished aroma, and sealing warm ingredients risks trapping condensation.
Expected result: cool, dry pieces with a clean chili aroma. If the batch smells acrid or tastes burnt, start again; grinding cannot remove a scorched flavor.
Coarse chili flakes
Crush in short bursts
- Add a small amount of prepared chili to the mortar or grinder. As a first trial, use enough pieces to produce about 1 tablespoon of flakes, rather than processing your entire supply.
- With a mortar, press down to break the skins, then use short grinding movements. With a suitable electric grinder, use brief pulses rather than a continuous run; 1-second pulses give you regular opportunities to inspect the texture.
- Stop and check after each pulse. Unplug the grinder before opening or redistributing pieces, following its instructions, and never reach toward an energized blade.
- Stop when most pieces look right for the intended dish. Separate any large fragments and crush those again instead of repeatedly grinding the entire batch.
Expected result: distinct flakes that scatter easily, with some natural variation in size. A homemade batch does not need to look factory-uniform to cook well.
For equipment selection, the guide to spice grinders for whole spices is a useful next read. A mortar gives direct control over a small batch; a suitable electric grinder reduces hand work but can overshoot into powder quickly.
Match the texture to the meal
Best for finishing: coarse flakes give pizza, eggs, noodles, and roasted vegetables visible pieces of chili. Their limitation is uneven distribution: one bite can contain more chili than another.
For sauces and rubs, a finer texture is often easier to distribute. Keep the two formats separate rather than expecting one jar to suit every recipe.
| Format | Best for | Advantage | Limitation |
|---|---|---|---|
| Coarse flakes | Finishing dishes and adding visible chili | Distinct texture and easy visual control | Less even distribution between bites |
| Fine flakes | Stirring through sauces and vegetable dishes | Smaller pieces with some texture retained | Continued grinding quickly produces powder |
| Fine powder | Rubs, spice blends, and smooth sauces | More even distribution through a mixture | Creates more dust and loses the flake texture |
When using 5Senses Kashmir Dried Red Chili (Marchwagan Melody), keep a coarse portion for finishing and grind only the portion needed for a sauce. You get two useful textures without changing the chili's identity or inventing a blend.
Fine chili powder: the second workflow
Grind, sift, and return
- Begin with prepared chili pieces or some of your finished flakes. Use fully dry equipment; damp residue can turn fine particles into clumps.
- Grind in short bursts, checking between runs. If the grinder becomes warm, stop and let it cool according to the manufacturer's instructions rather than extending the run.
- Let the dust settle before opening. Tip the powder gently through a clean, dry fine sieve into a bowl without shaking it near your face.
- Return only the coarse pieces to the grinder. Repeat until the texture suits your recipe, then transfer the powder to its own container.
Expected result: a relatively even powder without large skin fragments. Your grinder and sieve determine how fine it becomes; a home-ground batch need not match commercial milling.
Best for rubs and smooth sauces: fine chili powder distributes more evenly than coarse flakes. The trade-off is dust during preparation and less visible texture in the finished dish.
Label single-ingredient powder clearly. A jar containing only ground dried chilies is different from a seasoning blend sold as chili powder, which can contain other spices and salt. Check the recipe before substituting between them.
Keep the comparison useful
Divide the first batch between 2 jars: one for flakes and one for powder. Use the same chili and the same toasting decision so texture is the main difference you are comparing.
Taste each format in a small portion of the same cooked food. Add gradually, stir thoroughly, and taste again before seasoning the whole dish. Do not assume the same spoonful of flakes and powder contains the same amount of chili; particle size changes how a spoon fills.
Storage and batch labels
- Let toasted chilies and freshly ground batches cool completely before closing the container. Keep the batch away from steam while it cools.
- Transfer the flakes and powder into clean, dry, airtight jars. Choose containers suited to the amount you made rather than leaving a tiny batch in an oversized container.
- Label each jar with the chili name, grinding date, texture, and whether it was toasted. Record seed removal too if you want to repeat the batch.
- Store away from heat, light, and moisture. Spoon seasoning into a small dish before adding it to a steaming pan instead of shaking the storage jar over the stove.
Expected result: separate, clearly identified batches that stay dry and are easy to use. Keep most of your supply whole, then replenish the ground jars as your cooking requires.
Do not assign a universal expiry date based only on grind size. Storage conditions and the condition of the original chilies matter. Follow the product's storage guidance, discard spoiled ingredients, and use aroma and cooking performance to judge whether a sound batch still delivers the flavor you want.
Troubleshooting
The skins bend instead of breaking
The chilies are not brittle enough for clean dry grinding. If they are otherwise sound, dry them further using suitable drying equipment and its instructions, then cool completely before trying again. Never use drying to rescue moldy or musty chilies.
The flakes become powder immediately
The grinder is processing too aggressively for the target texture. Shorten the pulses, reduce the batch, or switch to a mortar. Save the powder for another use; you cannot turn it back into flakes.
Large strips remain among fine dust
The starting pieces are uneven or the grinder is not circulating them well. Cut the strips smaller and reprocess only those pieces. Do not keep grinding the fine portion while waiting for a stubborn strip to break.
The finished seasoning tastes bitter
Check for scorched chili skins or burnt residue in the pan or grinder. Clean the equipment and compare a fresh, untoasted batch. Adding other spices does not remove burnt flavor.
Chili dust escapes when the lid opens
Stop grinding, leave the lid closed, and allow the dust to settle. Open gently with ventilation and your face turned away. If electric grinding remains irritating, use manual crushing for coarse flakes instead.
Customize your workflow
Build a repeatable pantry ritual: inspect, crush, cook, and note the result. For 5Senses whole spices, keep the ingredient name and any verified origin information with your batch notes rather than losing that detail when you transfer containers.
Bloom flakes briefly in cooking fat when the recipe calls for it, then add the remaining ingredients before the chili scorches. For a wet sauce, rehydrate a separate portion of whole chilies instead of wetting the batch reserved for flakes. Dry grinding and rehydrating solve different cooking problems.
If storage is the weak point in your routine, use the whole-spice airtight storage workflow to organize containers and handling. Preparation tools help only when they match the task; do not assume every spice mill accepts dried chili skins.
FAQ
How do you make chili flakes from dried whole chilies?
Remove the stems, split sound dry pods, and crush the brittle skins in short bursts. Stop while distinct flakes remain, then store the cooled batch in a clean, dry, airtight container.
Do you have to remove the seeds before making chili flakes?
No, seed removal is optional and mainly changes the texture. Removing seeds alone does not reliably control heat because capsaicinoids are concentrated in the pale internal tissue.
Should you toast dried chilies before grinding them?
Toasting is optional and adds a roasted note. Use gentle heat, keep the chilies moving, and cool them fully before grinding; discard a scorched batch.
Can you make chili flakes without an electric grinder?
Yes, a mortar and pestle can crush brittle dried chili pieces into flakes. Work in small batches and use pressing movements before grinding to control the texture.
Why are my dried chilies turning into a paste instead of powder?
Moisture in the chilies or equipment prevents clean dry grinding. Keep soaked chilies for wet sauces and use fully dry ingredients and tools for flakes or powder.
Are homemade chili flakes and chili powder interchangeable?
Not automatically: flakes and powder distribute differently and pack differently into a spoon. Single-ingredient ground chili also differs from chili powder seasoning blends that contain additional ingredients.
What is the best way to store homemade chili flakes?
Store fully cooled chili flakes in a clean, dry, airtight container away from heat, light, and moisture. Label the chili and grinding date, and keep the jar away from cooking steam.
One last thing
Do not grind the whole batch just to fix a few oversized pieces. Separate those pieces and crush them again. That small sorting step preserves your flakes while giving the stubborn strips the extra work they need.