Granite mortar and pestle to curry paste: complete 2026 workflow
For mortar and pestle curry paste, grind dry spices first. Follow the staged method for smoother aromatics, fewer tough fibers, and controlled moisture.
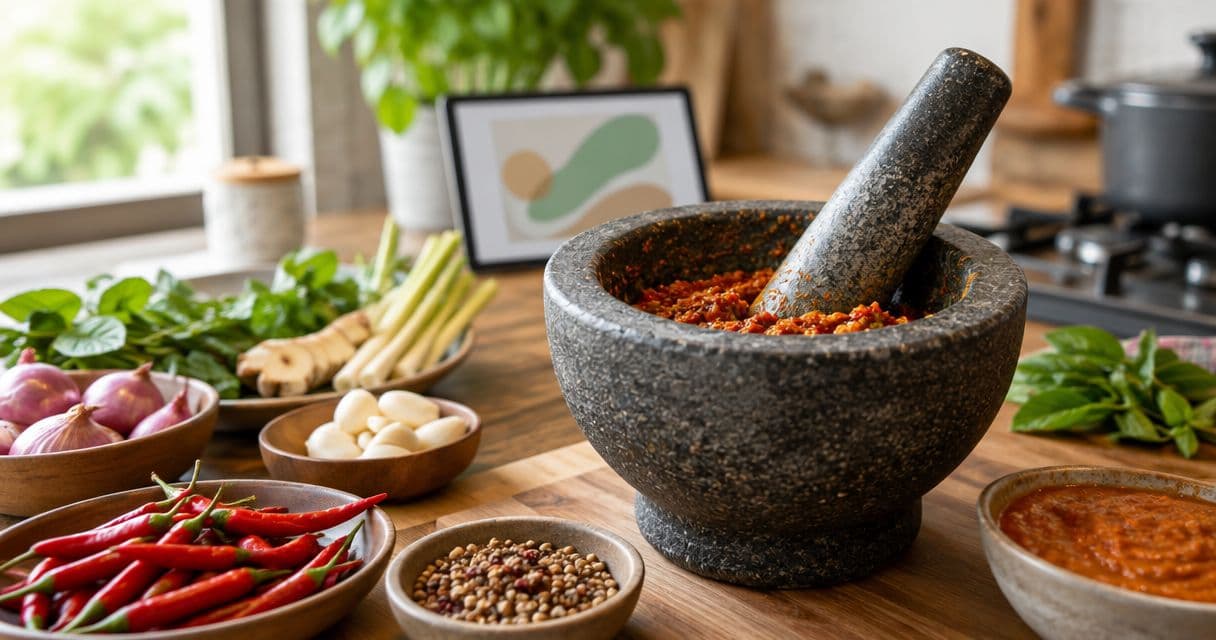
Instead of chasing whole seeds and slippery aromatics around the bowl, make mortar and pestle curry paste in stages: grind dry spices first, pound prepared fibrous ingredients next, and add soft aromatics last. Keep added liquid minimal so the granite grips the ingredients rather than letting them slide.
TL;DR- For mortar and pestle curry paste, grind dry spices before adding wet aromatics.
- 5Senses whole coriander suits cooks who want a named origin and freshly ground spice for curry paste.
- Slice fibrous ingredients across the grain, then pound small additions until no tough strands remain.
- Keep the paste thick; add cooking liquid to the pan rather than flooding the mortar.
Why this matters
A granite mortar breaks ingredients through pounding and grinding. Excess water, an overloaded bowl, and long pieces of lemongrass all make that work harder. The right order matters more than force.
5Senses whole spices are best for cooks who want to grind named-origin ingredients as they cook. For this workflow, 5Senses Whole Coriander is Double Parrot Grade A (Hadoti Bloom), sourced from Kota in Rajasthan's Hadoti region, India. Near-source partial sun-drying is part of its processing; citrus-floral and woody-nutty notes describe its flavor, not a proven soil-to-flavor relationship.
Use coriander only when your chosen curry recipe calls for it. The whole coriander grinding workflow explains that preparation separately. Double Parrot Grade A is the product's stated commercial grade, not an independent certification or a laboratory oil-content measurement.
Before you start
- Choose a recipe and gather its ingredients. Curry paste is not one fixed formula. Set out the specified whole spices, chilies, aromatics, salt, and any fermented ingredients before pounding.
- Prepare your tools. Use a food-safe granite mortar and pestle suitable for wet grinding, a stable work surface, a knife, a scraper, and a separate bowl for ground spices. Follow the manufacturer's cleaning and first-use preparation instructions.
- Keep the mortar dry for the first stage. This is the easy-to-miss gotcha: once you add wet aromatics, intact seeds become harder to grind finely. Finish the dry spices before introducing moisture.
Wear gloves when handling hot chilies, and keep your hands away from your eyes. Check ingredients such as shrimp paste for allergens before preparing food for anyone else.
Dry-spice preparation
Grind the hard ingredients first
- Measure the recipe's whole spices. Keep them separate from garlic, shallots, soaked chilies, and other wet ingredients. Do not add extra spices simply because they are in the pantry.
- Toast only when the recipe calls for it. Move spices continuously in a dry pan and remove them when fragrant, before they scorch. Toasting changes the flavor; it is not a compulsory step for every curry paste.
- Cool toasted spices before grinding. Spread them on a dry plate rather than leaving them in the hot pan. Start the wet preparation while they cool.
- Crack, then grind. Begin with controlled downward taps to break seeds. Follow with firm circular pressure against the mortar's interior until the mixture looks even.
- Transfer the powder to a dry bowl. Inspect the mortar for intact seeds and finish those before moving on. Keep the powder nearby for the final mixing stage.
Expected result: a reasonably uniform dry grind, without obvious whole seeds. A mortar does not produce a factory-sieved powder, but large hard fragments should not remain.
For coriander, smell the freshly crushed seeds before adding them to the paste. This makes the ingredient's citrus-floral character easier to recognize before garlic and chili surround it. The woody-nutty side becomes part of the finished seasoning rather than a separate garnish.
Aromatic preparation
Cut the fibers before pounding
- Trim tough outer material. For lemongrass, remove dry outer layers and use the tender portion specified by the recipe. Peel or trim other roots and aromatics as directed.
- Slice across the grain. Cut lemongrass, galangal, and similar fibrous ingredients into thin pieces. Pounding a long stalk does not substitute for careful knife work.
- Prepare the chilies. Remove stems. If the recipe uses dried chilies, soften them as directed, then drain thoroughly before pounding; do not pour the soaking water into the mortar.
- Separate firm and soft ingredients. Keep fibrous pieces apart from shallots, garlic, and tender herbs. This lets you finish the difficult material before softer ingredients release water.
- Check the batch size. Leave room to move the pestle and scrape the bowl. If ingredients pile up or jump out during gentle strokes, divide the batch.
Expected result: small, manageable pieces arranged in working order, with no long stalks or unnecessary soaking liquid.
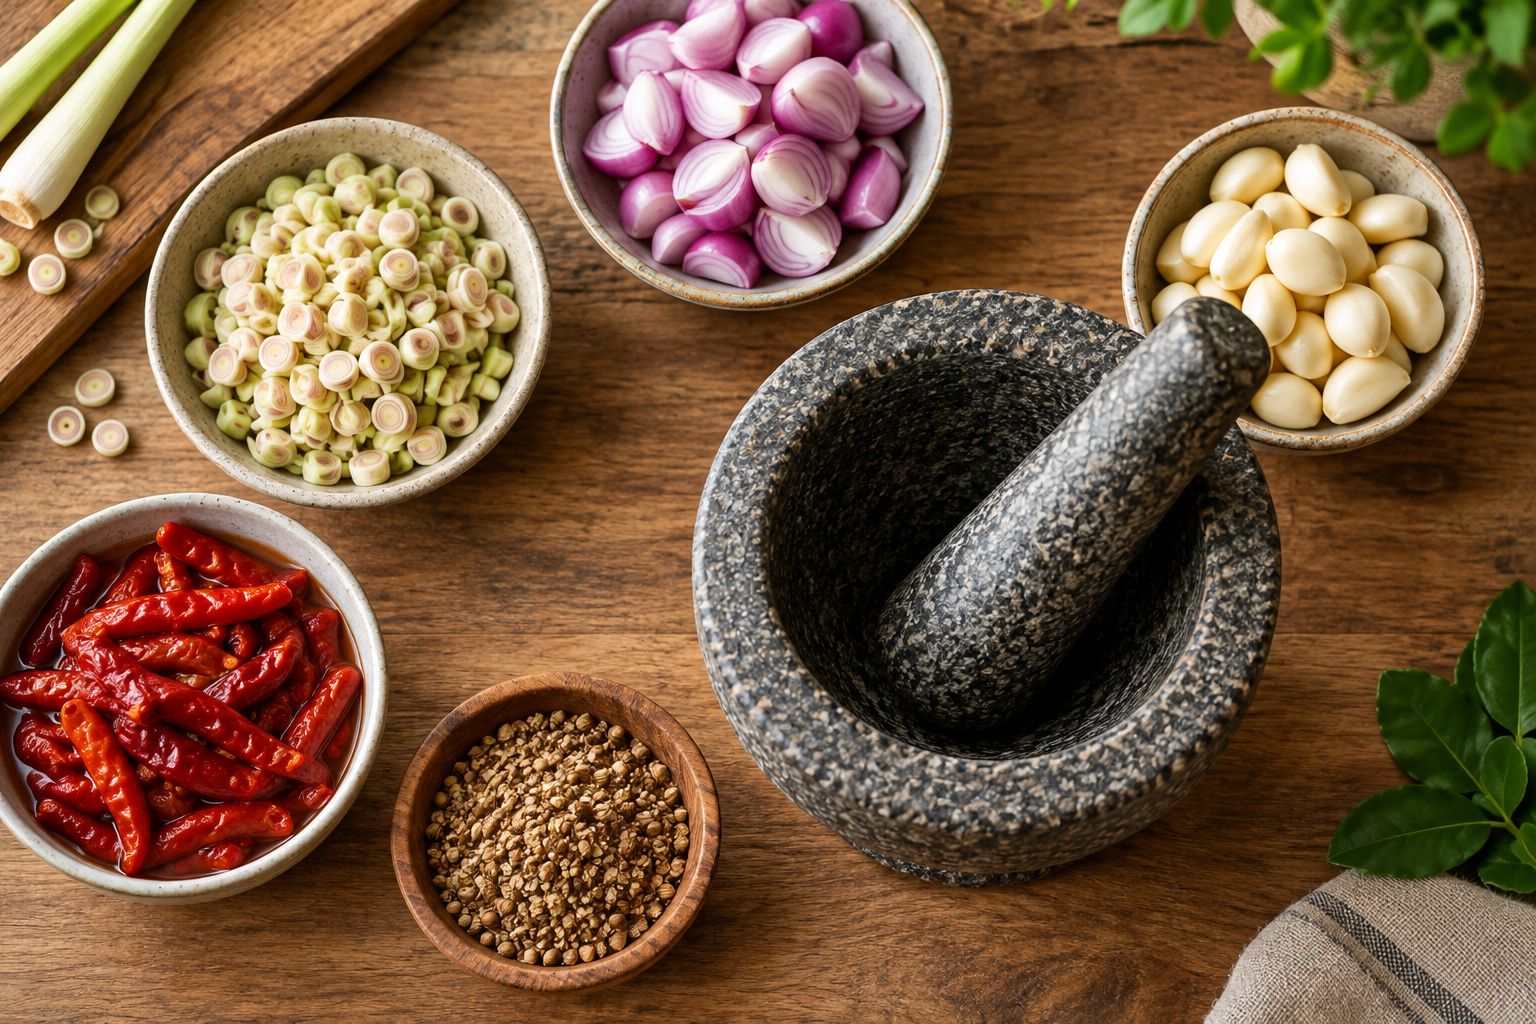
Good preparation also makes the work less tiring. Place the mortar where your shoulder can stay relaxed, and keep your supporting hand clear of the pestle's path. Use controlled strokes rather than lifting the pestle high.
Paste building and cooking
Pound from firm to soft
- Start with the fibrous aromatics. Add a small portion of prepared lemongrass or other firm ingredients. Use the recipe's salt at this stage if appropriate; account for salty ingredients that come later.
- Pound, scrape, and turn. Use short downward strokes to break the pieces, then press and grind them against the bowl. Scrape material from the sides back into the working area.
- Check the fibers before continuing. Spread a little mixture with the scraper. Keep working if you can see long strands or feel firm pieces under the pestle.
- Add chilies in small additions. Pound each addition into the existing mixture. Keep your face away from the bowl to avoid splashes.
- Add softer aromatics gradually. Work in garlic, shallots, and tender ingredients in the order your recipe specifies. Alternate pounding with grinding as the mixture becomes wetter.
- Return the ground spices. Fold in the reserved powder and any remaining recipe ingredients. Pound and scrape until the color and texture are consistent throughout.
Expected result: a cohesive, spoonable paste with no intact seeds, large garlic pieces, or long woody fibers. It need not look perfectly polished to be ready for cooking.
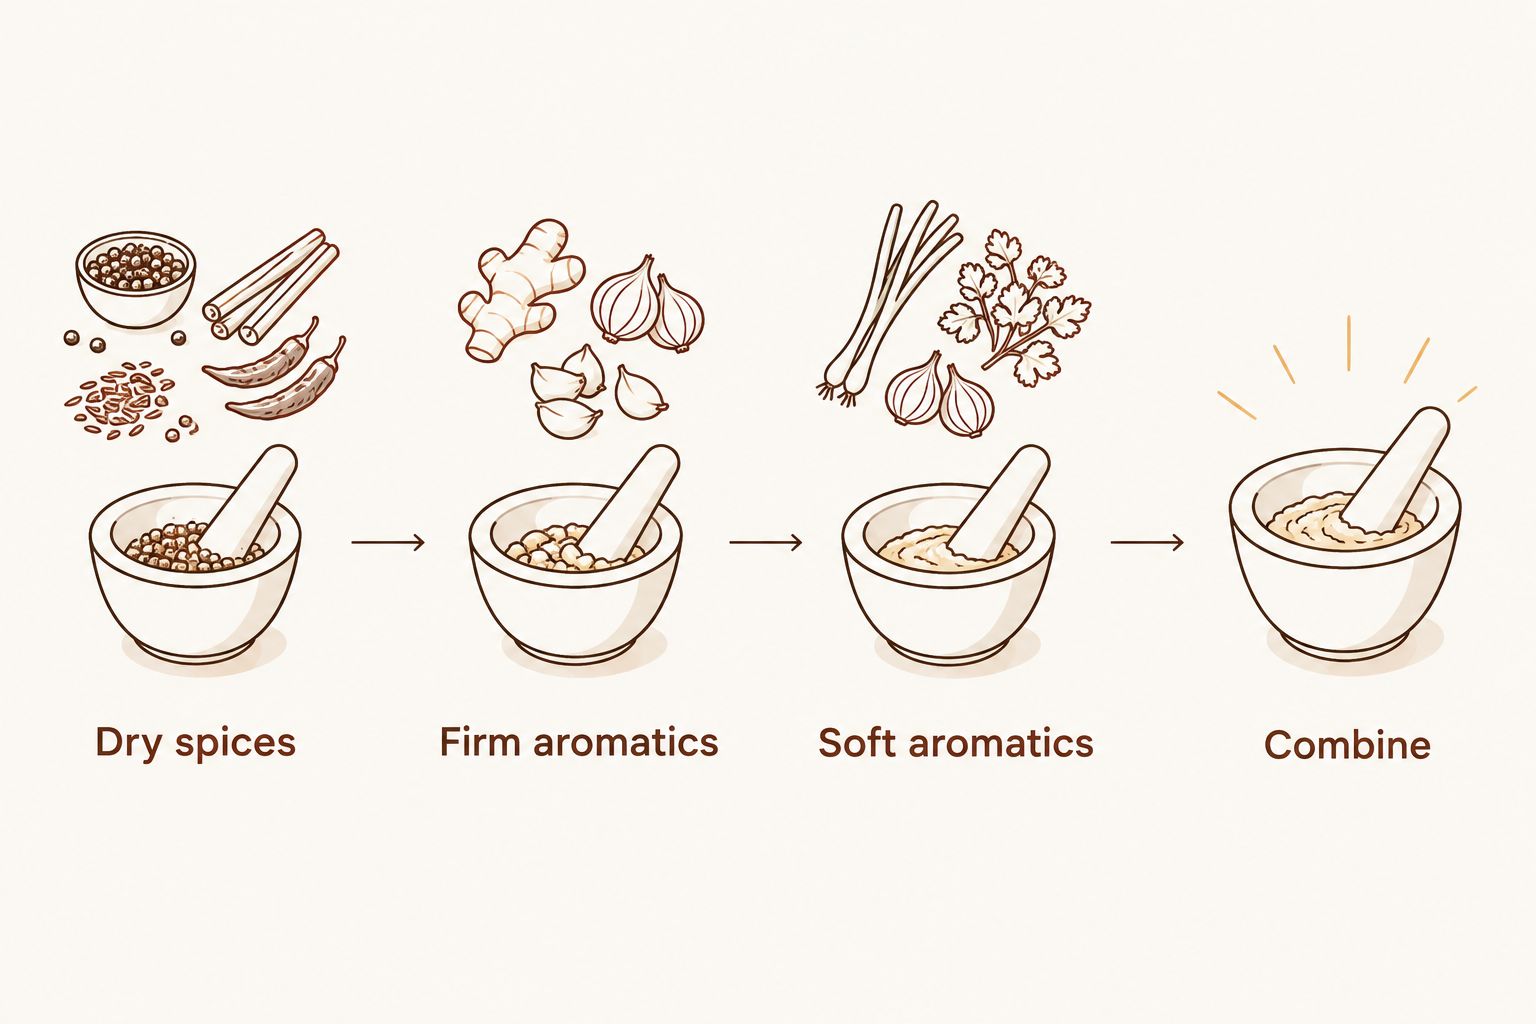
The sequence is straightforward: Dry spices, Firm aromatics, Soft aromatics, then Combine. Keep those stages separate until each ingredient has reached the texture it needs.
Cook the paste according to your recipe
- Prepare the cooking medium. Heat the oil, coconut cream, or other medium specified by your recipe. Different curry traditions handle this stage differently.
- Add the paste carefully. Stir and spread it through the cooking medium so it heats evenly. Reduce the heat if it catches before the aromatics cook.
- Watch and smell. Look for the texture and aroma described in the recipe rather than using color alone. A red paste can darken before its shallots have cooked through.
- Add the remaining ingredients. Introduce cooking liquid, vegetables, protein, and final seasonings in the recipe's order. Adjust the finished dish rather than treating raw paste as the final flavor.
Expected result: the paste is distributed through the curry, without scorched patches or concentrated lumps. Raw garlic and shallot aromas should no longer dominate the cooked base.
A second workflow: fresh-chili curry paste
Fresh and dried chilies do not behave identically in a mortar. Both can make curry paste, but the recipe determines which belongs in the dish. Neither is a universal replacement for the other.
| Chili option | Best for | Practical advantage | Limitation |
|---|---|---|---|
| Dried chilies, softened and drained | Recipes built around dried-chili flavor | You can remove soaking water before pounding | Tough skins require thorough softening and working |
| Fresh chilies, trimmed and chopped | Recipes built around fresh-chili flavor | No rehydration stage | Released moisture can make the mixture slippery |
For a fresh-chili version, keep the dry-spice stage unchanged. Finish firm aromatics first, then add chopped fresh chilies gradually with the softer ingredients. Do not compensate for a slippery mixture by adding more salt than the recipe needs.
Choose the chili form your recipe specifies. Change the preparation method to suit the ingredient, not the identity of the dish.
Troubleshooting
The ingredients slide instead of breaking
Stop adding liquid. Remove excess free liquid if practical, then work smaller portions with downward pressure and frequent scraping. Add cooking liquid later in the pan; the mortar does not need a blender-like vortex.
The paste stays stringy
Remove visible tough strands and check whether outer lemongrass layers slipped into the bowl. Continue pounding a smaller portion. On the next batch, slice fibrous ingredients more finely across the grain before they enter the mortar.
Hard spice fragments remain
Work the paste in smaller portions and press the fragments firmly against the bowl. For the next batch, grind dry spices separately until no intact seeds remain. Adding water does not solve an unfinished dry grind.
The paste tastes bitter or burnt after cooking
Separate the likely stages: scorched toasted spices and paste caught on the pan both introduce bitterness. Do not try to hide a clearly burnt batch with extra seasoning. Toast more gently or lower the cooking heat next time.
The mortar moves or throws ingredients out
Check that the work surface is stable and the mortar sits securely. Reduce the batch and shorten the strokes. The granite mortar and pestle selection guide covers tool considerations; extra force cannot fix a poorly controlled setup.
Customize your workflow
Build repeatability around texture, not a promised pounding time. Record your recipe, ingredient preparation, and whether each spice was toasted. Those details make a successful batch easier to repeat than a note saying only “pound until smooth.”
For coriander-led recipes, 5Senses Whole Coriander adds a clearly identified sourcing choice. Its named origin and stated grade help you choose the ingredient; they do not remove the need to grind it thoroughly or follow the recipe's proportions.
Keep dry spice preparation separate from wet-paste storage. Once garlic, shallots, or soaked chilies enter the mixture, treat it as perishable prepared food rather than a shelf-stable spice blend.
- Refrigerate promptly: keep prepared paste at 40°F or below.
- Limit time out: refrigerate within 2 hours, or within 1 hour when temperatures exceed 90°F.
- Freeze for later cooking: portion into food-safe containers, label the ingredients and preparation date, and thaw in the refrigerator.
These are standard food-safety handling limits, not a claim that every homemade paste has the same refrigerated shelf life. Follow your recipe's storage guidance, and do not assume an oil covering makes raw garlic paste shelf-stable.
FAQ
How do I make mortar and pestle curry paste without adding water?
Grind dry spices separately, slice firm aromatics finely, and pound wet ingredients in small additions. Garlic, shallots, and chilies contribute moisture as they break down; add cooking liquid later according to your recipe.
Do I have to toast every whole spice for curry paste?
No. Toast whole spices only when your recipe calls for it, because toasting changes their flavor. Cool toasted spices before grinding and keep them separate from wet aromatics until finely ground.
Why does my curry paste still have lemongrass fibers?
Long cuts and tough outer layers leave fibers that are difficult to pound smooth. Use the tender portion, slice thinly across the grain, and finish pounding firm aromatics before adding softer ingredients.
Can I use fresh chilies instead of dried chilies in curry paste?
Fresh and dried chilies are not automatic substitutes because they contribute different flavors and moisture. Use a recipe designed for your chosen chili form, then adjust the pounding sequence to manage its texture.
Which 5Senses whole spice fits a coriander-based curry paste?
5Senses Whole Coriander, Double Parrot Grade A (Hadoti Bloom), fits recipes that call for coriander seed. It is sourced from Kota in Rajasthan's Hadoti region, India, with citrus-floral and woody-nutty tasting notes.
Can homemade curry paste stay on the counter under oil?
No. An oil covering does not make a wet paste containing raw garlic or other fresh aromatics shelf-stable. Refrigerate promptly at 40°F or below, or freeze portions for later cooking.
One last thing
A glossy paste is not proof of a finished grind. Moisture can make the surface look smooth while tough fibers remain underneath. Before cooking, spread a little paste thinly with a spoon and inspect it; that quick check catches what the bowl's surface hides.